Until now in our series, we have only encountered Stateless widgets and it was only one time that we encountered a Stateful widget. I saved the topic of state to explain later and the time has come! Yup, if you were wondering until now that what the heck is the state?
I am glad you asked! In this article, we will discuss state, stateful and stateless widgets in detail. So, let's get started right away.
State!🤨 What is this by the way?🤔
I am sure you have encountered many definitions of state on the internet previously and to be honest they all seem to be pretty complex to understand because of the bookish definitions. Yes, I have been there too.
Well, I will try to explain in as simple words as possible,
State is some data or information that is used by your app that would trigger flutter to rebuild the complete UI or certain parts of UI based on the changed data.
Basically, flutter keeps a snapshot of the widget that is currently rendered, and if any data inside that widget changes then the earlier snapshot data and current data are compared, and the concerned widget is rebuilt!
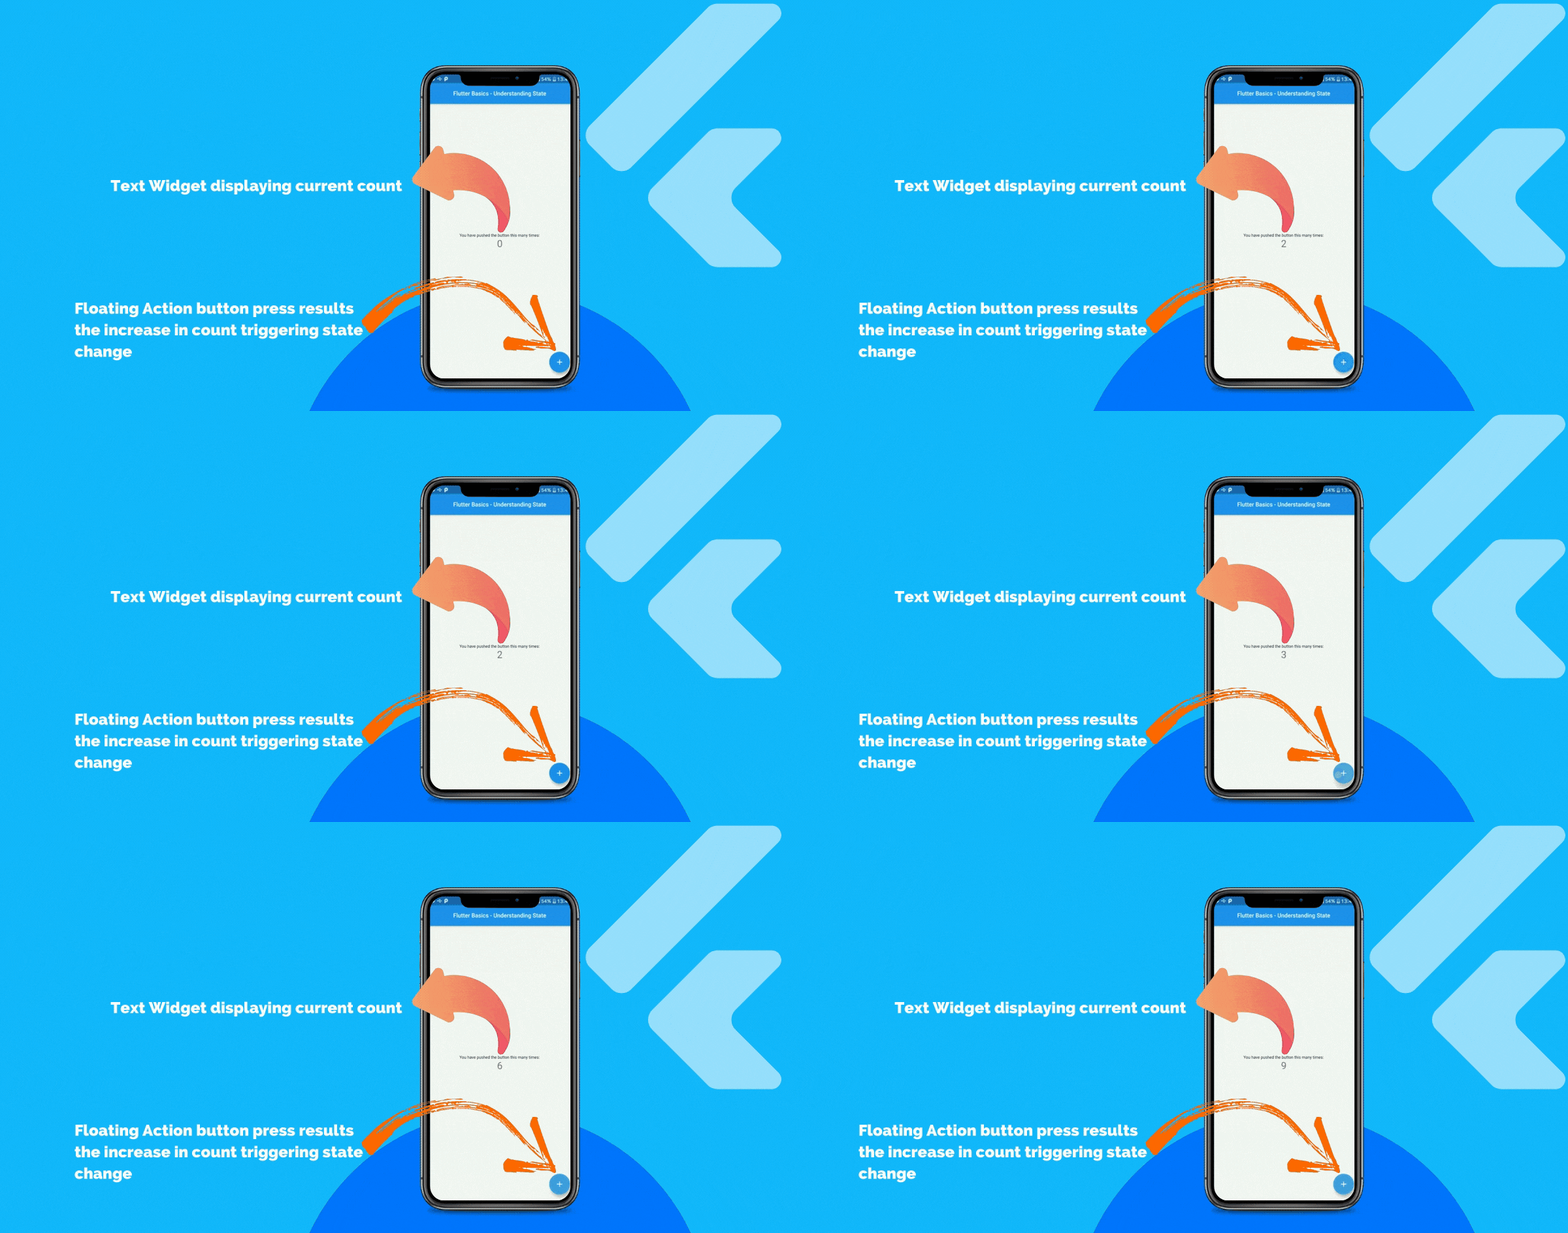
This is a state in layman's terms and I would also like to explain the state in further detail. So, consider the example of the default app that flutter gives us when we create a new flutter project.

Above you can see that as the Floating Action Button is pressed the count that is displayed in the text widget reflects the changes. Well, you might ask how this happens? Let's investigate further.
The initial value of the variable
counteris zero, hence0is displayed at first.As soon as the button is pressed, a function is attached to the button's
onClick(){...}method which increases the value of thecounterby1. So, the value increases by1on every button press.As soon as the value of the
countervariable changes flutter detects these changes hence triggering thebuild(){...}method of the widget in which thecountervariable lives.Once the
build(){...}method is triggered a complete build of all the child/nested widgets inside that widget is rebuilt with new data.Hence, we see the updated data in real-time. This is how the state works in flutter.
In case you are wondering how efficient is a complete UI rebuild, just relax because flutter is pretty efficient and smart in detecting the widgets that need a rebuild and only rebuild those. We will discuss this in detail in another article about how the elements are rendered using the element, widget, and render trees!
App-Wide State
Values such as if the user is authenticated, some data that is fetched from the backend/server can be considered as an app-wide state. These types of data control the overall application.
Widget State
The widget state can be considered something like,
Is the loading spinner being shown when the data is being fetched from a backend/server.
The value of current user input or how many times did the user tapped the button in the case of our example app.
Widget states can and will typically change most frequently in any application.
Now we have a clear understanding of what the state does and how widgets are rebuilt let us proceed further to discuss stateless and stateful widgets.
Stateless Widgets
As the name suggests, all the widgets cannot/ will not rebuild themselves even if the data or variables inside them change. A typical stateless widget looks like this,
import 'package:flutter/material.dart';

class DummyWidget extends StatelessWidget {
  @override
  Widget build(BuildContext context) {
    return Container(
      // your nested widgets and children
      child: ...
    );
  }
}
So, any widget that extends the StatelessWidget class from the material package is considered a stateless widget by flutter. These widgets will not change when a user interacts with them, even if the data inside them changes. They are only concerned about displaying certain data with a certain styling.
These widgets are built only once, i.e, once they are rendered on the screen they won't change until and unless external data provide to them changes.
The build method of these widgets can be triggered only if the parent widget of these widgets are rebuilt or the data that is provided to them externally via their constructor changes.
Consider a case where a stateful widget is the parent of a stateless widget. If the
build(){...}method of the parent stateful widget is somehow triggered then the child stateless widget is also rebuilt.Stateless widget will rebuild if the data outside them changes like if a Provider is attached to a stateless widget and the widget is a consumer or active listener to the provider. As soon as the value(s) of the provider changes the stateless widget will rebuild.
Some of the examples of stateless widgets are,
Text(),Column(),Row(), etc.
We will discuss in great detail what are providers and how to use them in the upcoming articles. For now, let's move on to the stateful widgets.
Stateful Widgets
All the widgets that extend the StatefulWidget class are considered stateful widgets. These widgets will trigger their build methods as soon as the data inside them changes or the external data that is provided to them via their constructor changes. In both, the case the build(){...} method of these widgets is triggered. Have a quick look at an example of a stateful widget,
class DummyWidget extends StatefulWidget {
  @override
  _DummyWidgetState createState() => _DummyWidgetState();
}

class _DummyWidgetState extends State<DummyWidget> {
  bool _isGreen = false;
  @override
  Widget build(BuildContext context) {
    return Scaffold(
      backgroundColor: _isGreen ? Colors.green : Colors.red,
      appBar: AppBar(
        title: Text('Your First App'),
      ),
      body: Center(
        child: Column(
          mainAxisAlignment: MainAxisAlignment.center,
          children: <Widget>[
            FlatButton(
              onPressed: () {
                setState(() {
                  _isGreen = !_isGreen;
                });
              },
              child: Text(_isGreen ? 'TURN RED' : 'TURN GREEN'),
            ),
          ],
        ),
      ),
    );
  }
}
The above example is from my previous article. We can clearly see here that a lot is going on here as compared to the stateless widget.
What makes up a Stateful Widget?
Like a stateless widget, stateful widgets is not just one class but a combination of two classes.
class DummyWidget extends StatefulWidget {
  @override
  _DummyWidgetState createState() => _DummyWidgetState();
}
The first class extends the StatefulWidget which overrides the method createState(). The createState() method is provided by the StatelessWidget class.
We use the
@overridemethod deliberately to let flutter know that we are returning a new object that is based on the second class so that we can connect the two classes.
The second class consists of all widget state related logic.
class _DummyWidgetState extends State<DummyWidget> {
  @override
  Widget build(BuildContext context) {
    return Scaffold(
        // rest of the code
    );
  }
}
In this second class, which is named as _<widget_name>State where _ defines that it is private and the widget name is required to tell flutter which widget's state it will hold.
Now, this extends State which is a generic class imported from the material package. So we provide it the name of the widget to let flutter know which widget's state we want to bind it to.
The first class can be recreated as soon as the external data that is provided via the constructor changes but we need to persist the internal state of the widget when the rebuild due to external data change happens. Hence, we need two classes, the first one to trigger build if the external data changes and the second class to trigger rebuild if the data inside the widget changes.
The state is persistent, i.e, it is attached to that widget. But technically, unlike the first class, it is not recreated! It is important for storing the current state of the widget.
The setState(){...} method
In the above example, we are using a setState(){...} method that is executed once the FlatButton is pressed by the user. This function is provided by the State class which we inherit from the material package.
We wrap all the logic/code inside this function which changes the internal data. This internal data is used by the widget's build method so as soon as this data changes the build method is triggered.
Conclusion
That was in-depth of how stateless and stateful widgets work. I hope that now you have a much clearer understanding of behind the scenes stuff of how these work. In most of the apps, we use stateless widgets more frequently as compared to the stateful widgets because in most cases all we are concerned about is displaying some data.
But sometimes we use stateful widgets too where we need to have some internal data like if something is being fetched from or sent to the backend/server we need to display some type of progress using circular progress indicator, etc.
That was all for this post. I hope you liked it and an emoji on this would be awesome. Till then, Happy Coding👨🏽💻👩💻!
